Joshua Weissman Italian Beef

If you’re dipping it you gotta wrap it.
Joshua Weissman gives us sandwich made for dipping.
Difficulty:2/5
Ingredient Availability: 4/5
Time: 10 hrs 20 min
Joshua Weissman is a very entertaining Youtube chef who I always expect extravagant recipes from. When I watch his videos, there’s almost always a technique, tool, or ingredient that seems over the top for the typical home chef. This recipe is no different, recommending a deli slicer to slice the beef near the end. Despite this, everything he makes looks delicious and from what I’ve tried of his recipes before this one (Popeyes biscuits), I haven’t been disappointed.
I had never had an Italian Beef before trying this recipe, so I didn’t really know what to expect as far as the flavor profile goes, but coming from an experienced chef like him, I knew it had to be at least good. I contemplated just buying the rolls from the grocery store, but ended up making the ones he had in the recipe to give it an even better shot of being exceptional. In any case, how bad could braised beef between some bread be?
Key Ingredients and Omissions:

Beef Stock Ingredients
I used marrow bones instead of beef soup bones

French Roll Ingredients
This one seems to take a lot of yeast

Giardiniera Ingredients
I used Hungarian Peppers and Red Chile Peppers (no sachet)
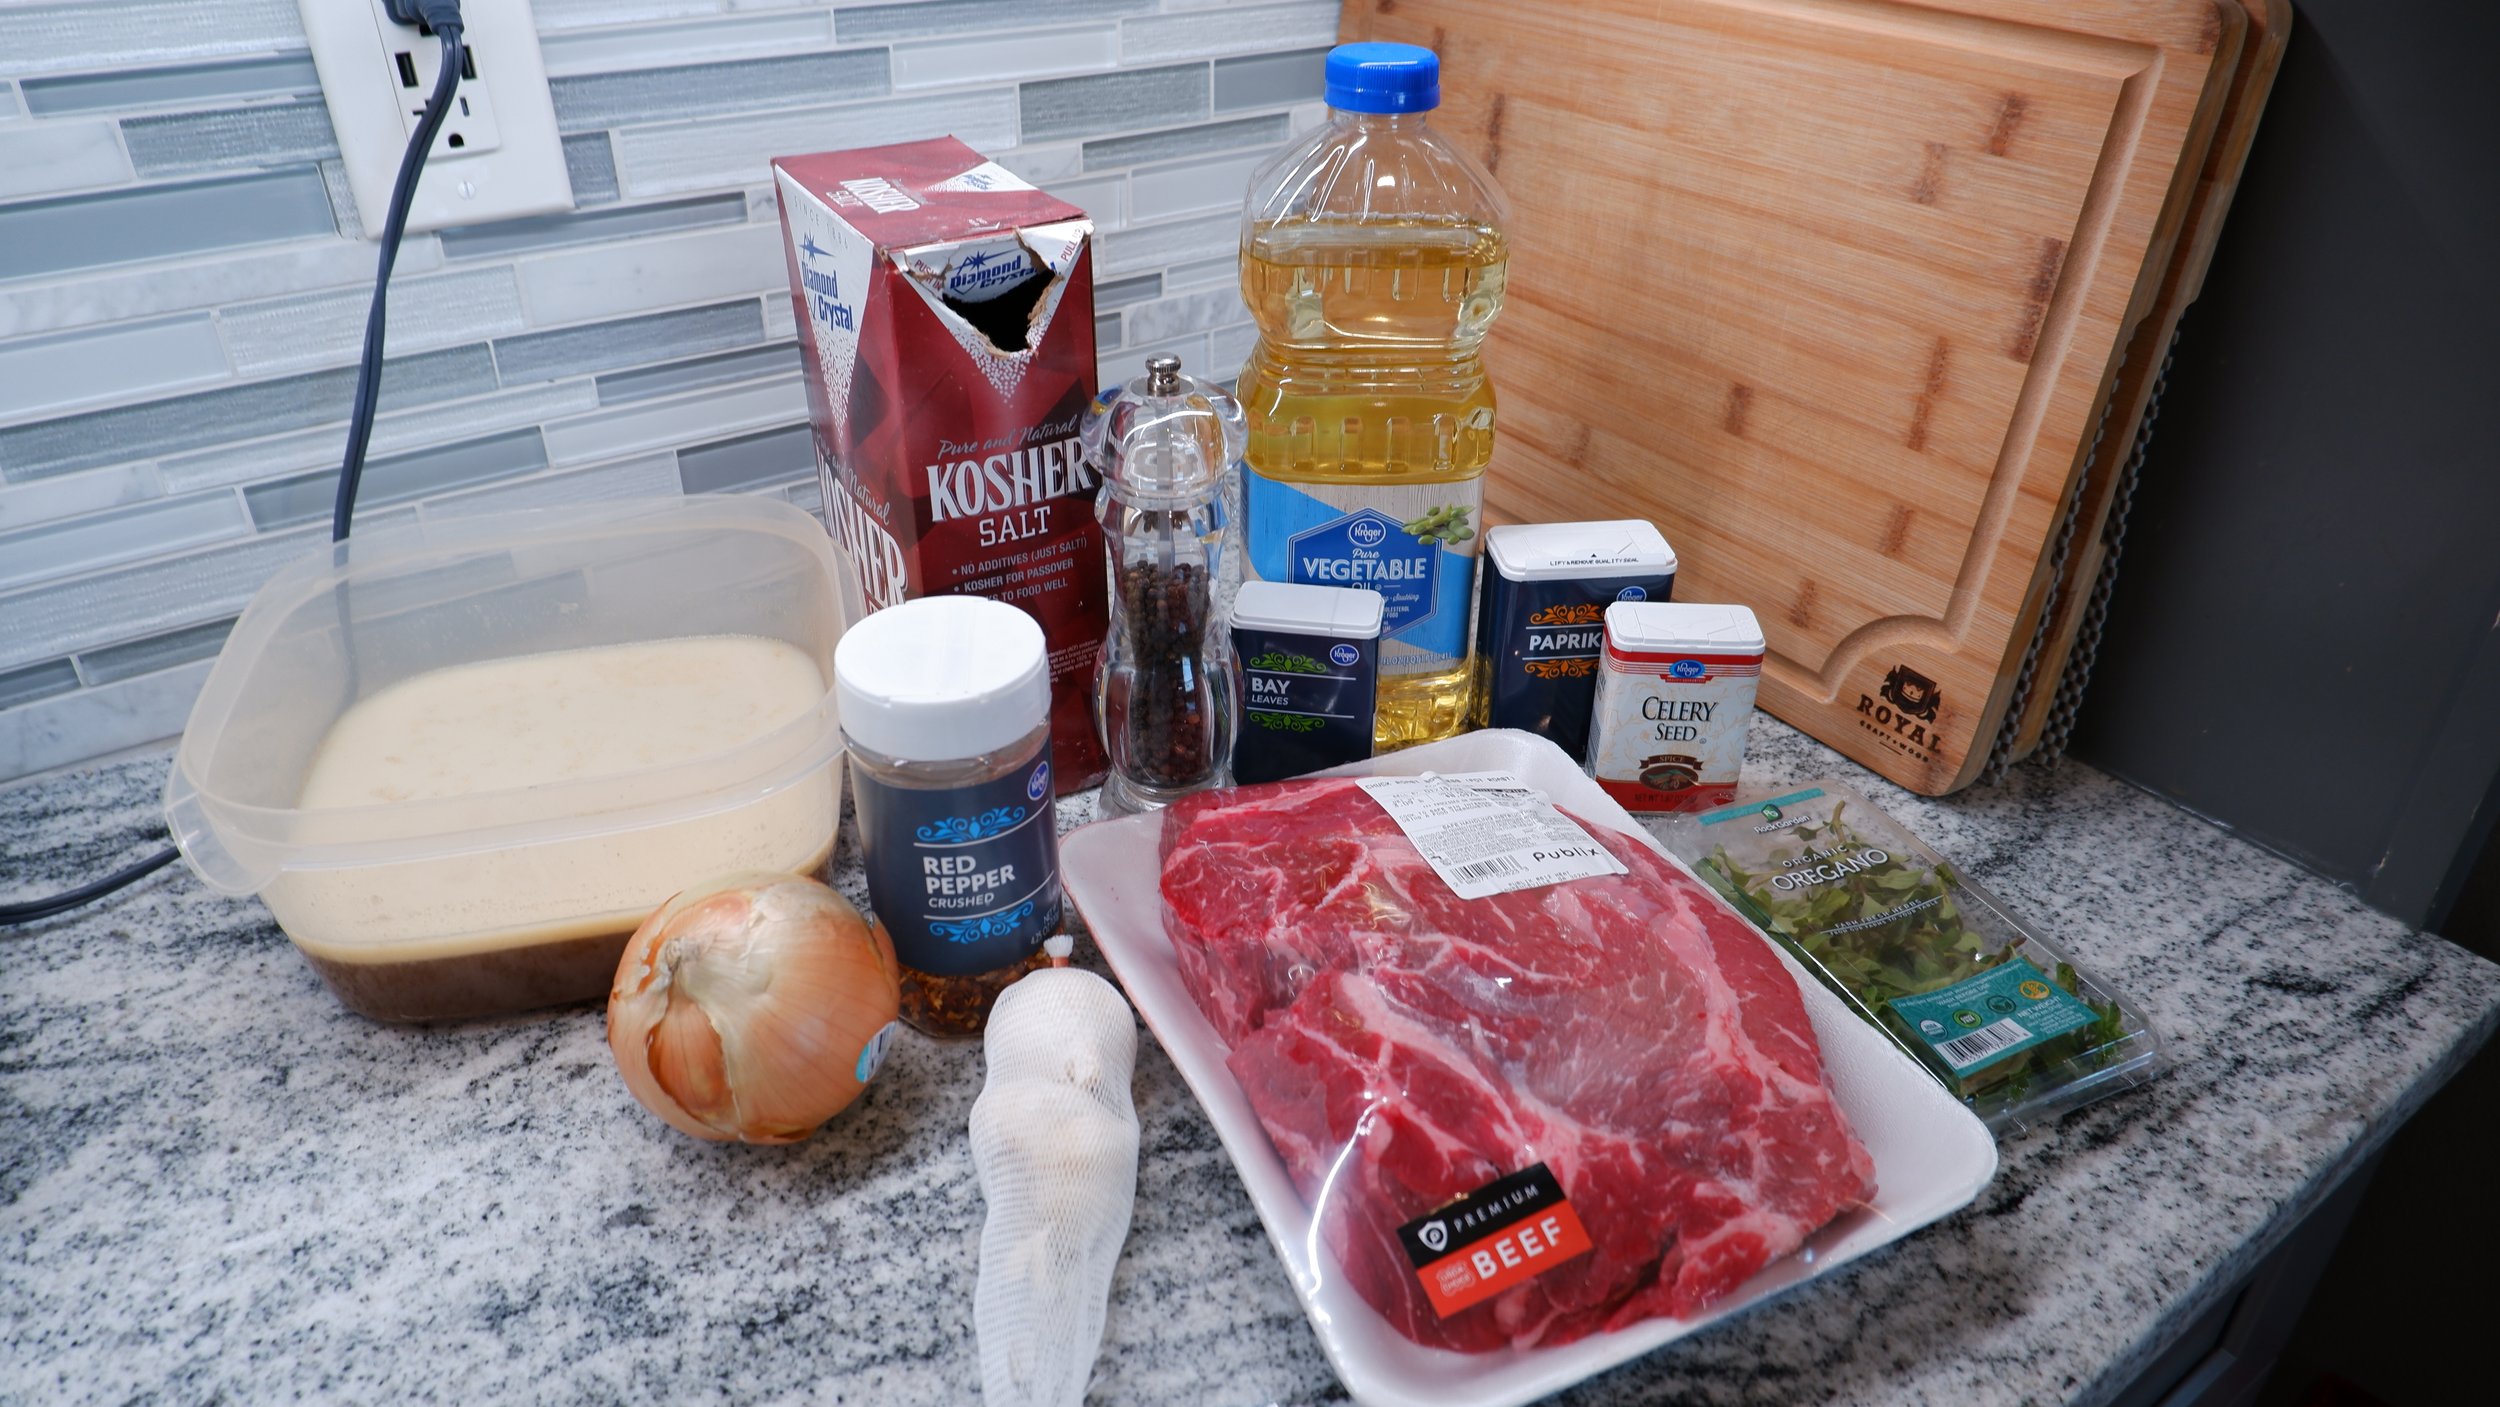
Braised Beef Ingredients
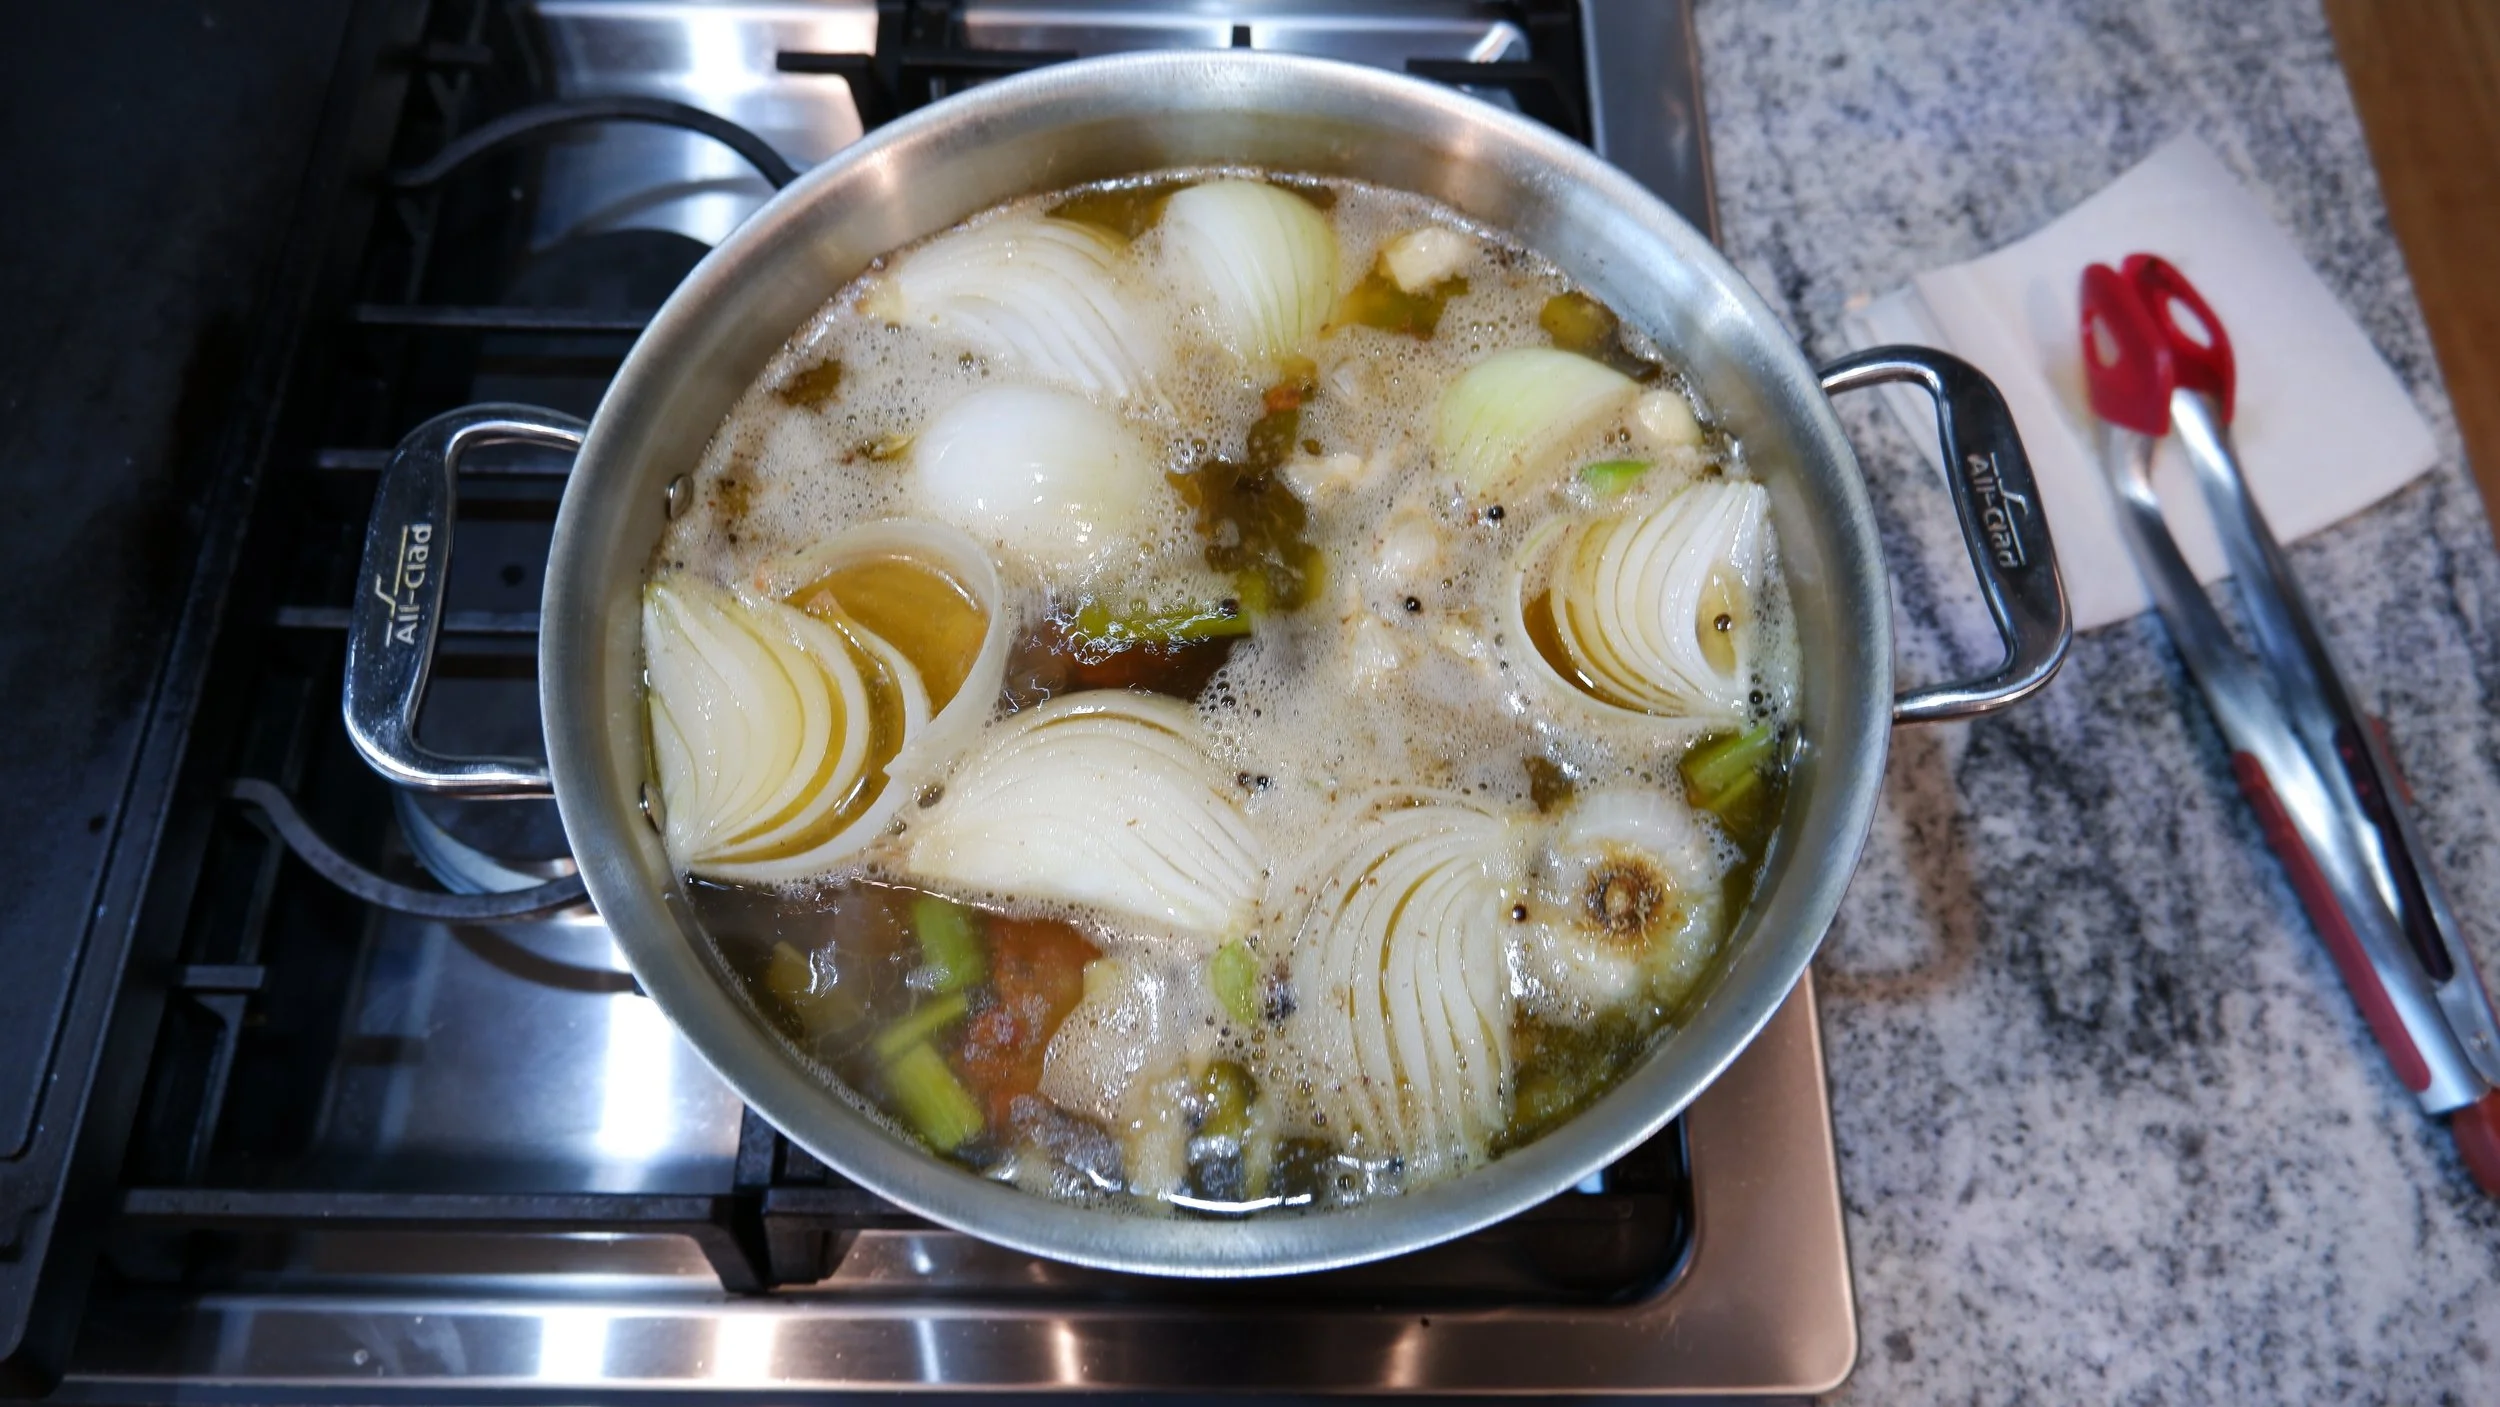
Notice that the beef stock has separated and the stock itself has gelatinized
While it was optional, I left out the soup base powder. I tried to find it at two different grocery stores with no luck. I’m not sure how big a difference it would have made, but I would’ve definitely liked to try this dish with it. Who doesn’t like a little extra umami?
I wasn’t able to find the exact same peppers that were named in the recipe, so I substituted the banana peppers with Hungarian peppers and the Serrano Peppers with Red Chile Peppers for the Giardiniera.
I found some Marrow bones at my local grocer, which I used instead of the beef soup bones. It was either the marrow bones or beef neck bones. Not sure how much of a difference this makes, but marrow definitely should add a slight health boost.
Unfortunately, I didn’t count the number of heads of garlic I had before shopping for this recipe, so Instead of the 5 heads that are called for during the braising step, I had to settle for 2.
Tools:
Large pot
Deli Slicer (no I don’t have one, nor do I recommend you get one)
Stand mixer
Cooking Review:
Beef Stock: 5 hours 30 minutes
Most of the time for this step is pretty hands off. I spent about 15 minutes preparing the vegetables before putting the oxtails and marrow bones in the oven to roast. Instead of spraying them with cooking spray as the recipe instructs, I used some of the confit olive oil that I had left over from a turkey confit. At such a high temperature of 475 degrees with convection, the roasting step went by much quicker than what the recipe suggested. At 27 minutes in, the smoke alarm went off in my house and the bones and tails were thoroughly browned. The smoke wasn’t very thick, but it was noticeable and there was more of a pleasant roasted meat smell than a smokey smell. This would be a good point to say that when you’re cooking with convection, it’s a good idea the lower the cooking temperature you would normally use by about 25 degrees, especially when baking. After dealing with the roasted meat and bones, I put the rest of the stock ingredients into a large pot, covered them with water and brought them to a boil, which took about 22 minutes. I then lowered the temperature then let it simmer for 4 hours before separating the solids. The stock had noticeably reduced, but I honestly couldn’t discern much flavor from it at that point. I started this step relatively late in the day, so I left it to cool before refrigerating overnight. If you want to make this entire recipe in one day, it would easily be 6+ hours of cooking, so I would advise you to split it in two days at least.


French Rolls: 3 hours
The bread is another time intensive, but largely hands off step of the process. After getting all the ingredients ready to go, I mixed the yeast with the water and sugar, where I was able to see the yeast start foaming (see below). I then mixed in the flour, one half of the total amount at a time. The mixing took 7 minutes total at speed 4 on my mixer. I then transferred the dough to an oiled bowl where it steamed up the bowl during its hour and 5 minute rise. It took me 16 minutes to form the noticeably warm dough into balls before letting them rest for 8 minutes. After the rest, I began working on forming the balls into rolls. I would recommend you let them rest for even longer, as I noticed that each ball got easier to work with as I went on. The first one was still pretty elastic, pulling back a pretty good amount when I tried to roll it. Each subsequent ball exhibited this behavior less than the previous one. I did go back to the first to to make them a little longer after I finished all 4 the first time. Overall, the dough is very easy to work with. It’s not very sticky at all. One thing to watch out for in this step is trapping air when folding the dough over. Try to press out all the air when you fold your dough oval over to avoid issues when rolling and baking. I let the dough rise again for 35 minutes before slashing the tops of two of them, spraying them with water, and baking for 27 minutes. Cooling wasn’t an issue at all because there was plenty more to work on.


Giardiniera: 30 minutes (excluding cooling)
This was easily the most simple part of the recipe. Simmer a pickling mixture, pour it over your veggies, and add some flavorings. I didn’t use a sachet because I didn’t have a suitable material to make it out of, so I just put everything directly into the mixture. It’s pretty easy to avoid most of the flavorings except for the celery seeds when spooning the mixture onto the sandwich, so I wouldn’t stress over having a sachet.


Beef:1hr 20 minutes (excluding cooling of 2hrs 20 minutes)
Cooking the beef was pretty easy as well. Just put some oil in the same large pot I made the stock in and sear the salted and peppered beef on all sides, which took about 7 minutes total. I then added the beef stock, which had gelatinized in the refrigerator. After adding the rest of the ingredients for this part, I brought the mixture to a boil before braising in the oven for an hour. The temp of my beef was closer to 200 degrees than the 130-135 that the recipe aimed for, but I honestly wasn’t worried. For a cut of meat like the chuck roast, I feel like the higher temp would make it more tender (a necessity since I’m not slicing it super then with a deli slicer). The recipe says to let it cool overnight in the refrigerator before slicing, but I just waited for 2 hours and 20 minutes before slicing it as thinly as I could with my chef’s knife. I then brought the juices that I had separated from the braising solids to a simmer and added the sliced beef. By this point, those juices were very flavorful, which gave me high hopes for the final result.


Analysis:
I tasted the bread on its own before having the sandwich put together and it’s pretty good. It is another example of a home made bread being better than the typical store bought. It was soft on the inside and crisp on the outside with a perfect balance between saltiness and sweetness. It has more flavor than what the ingredient list may have you believe. This could be due to the seemingly large amount of yeast that’s in this bread, which could contribute some interesting flavors even in a relatively short time. I would definitely recommend this bread for any sandwich.
Now, time to analyze this sandwich, the Italian Beef. Although I didn’t take a picture of the dipped sandwich, I did indeed dip the sandwich in the Jus (a half dip). This sandwich is intensely beefy, which is to be expected from a beef sandwich, but the beef itself takes a backseat to the jus. Nearly all the flavor is concentrated in the jus. There is a pretty big difference between parts of the sandwich that are saturated with the juices and the parts that aren’t. Without it, the sandwich is ok, definitely being helped by the acidic and slightly sweet Giardiniera that adds a nice kick or spice at points (I wouldn’t skip this). The beef is tender, as expected, but just doesn’t have the flavor to carry the sandwich on its own. This one needs to be fully loaded and dipped to get the full experience. While very fatty, with everything combined, I had no problem finishing the sandwich. If assembled right, this recipe gets a 8/10. While fairly time consuming, none of the steps were overly technical or difficult. Plus. The result is unique and gives you multiple things that you can make separately if you don’t want to go all out and make the whole thing. If the beef had the same flavor on it’s own that the jus had, then It’d be hard not to give the recipe an extra point, if not a perfect score.

It definitely needs everything that comes with it