Cubano Bread from An Unapologetic Cookbook
I wouldn’t judge you for thinking it’s a baguette
Home made bread has been pretty hit or miss for me in the past
Time: 3 Hours
Difficulty: 2/5
Ingredient availability: 5/5
I’ve made a few breads in the past. Most of the time, I don’t find them to be all that much better than store bought bread. Of course, I appreciate the crisp crust and pleasant aromas of a fresh baked bread, but I can’t eat a while loaf of bread at once. Both the aroma and texture only last for about a day before the bread becomes stale and require toasting. Since I was planning on making the Cubanos from Joshua Weissman’s An Unapologetic Cookbook, I went ahead and made the bread that goes with it, just to have another review ready to go.
Key Ingredients and Omissions:

Very minimal Ingredients here
Bread typically is a food where every ingredient is important. This is no different. The active dry yeast selection over instant yeast is important, as they need to be prepared and used differently. Also, I’m pretty sure the use of lard is important. I wouldn’t risk substituting it with another fat. No ingredients were omitted or substituted.
Tools:
Stand Mixer
Spray Bottle
Cooking Review:
‘Blooming’ Yeast: 24 minutes
I just used water straight from the tap, with came out over the 100 degrees that the recipe asks for, so I just waited for it to cool down before adding the yeast and letting it bloom and foam up for 10 minutes. Sometimes the yeast takes longer to start showing signs of life, but if it never foams or creates bubbles, your yeast may be dead. Here you can see the what it looks like before and after the 10 minutes.


Mixing Dough: 6 Minutes
The dry ingredients were added to the bowl of a stand mixer and mixed to combined. The yeast and water were added next, followed by the lard. This was mixed for 6 minutes in total (3 minutes to combine, 3 minutes to knead).


Rise and rest: 1 hour 5 minutes
The dough was formed into a ball and transferred to a bowl sprayed with cooking spray. I let it rise for an 53 minutes before punching down, dividing, and letting rest for 10 minutes.


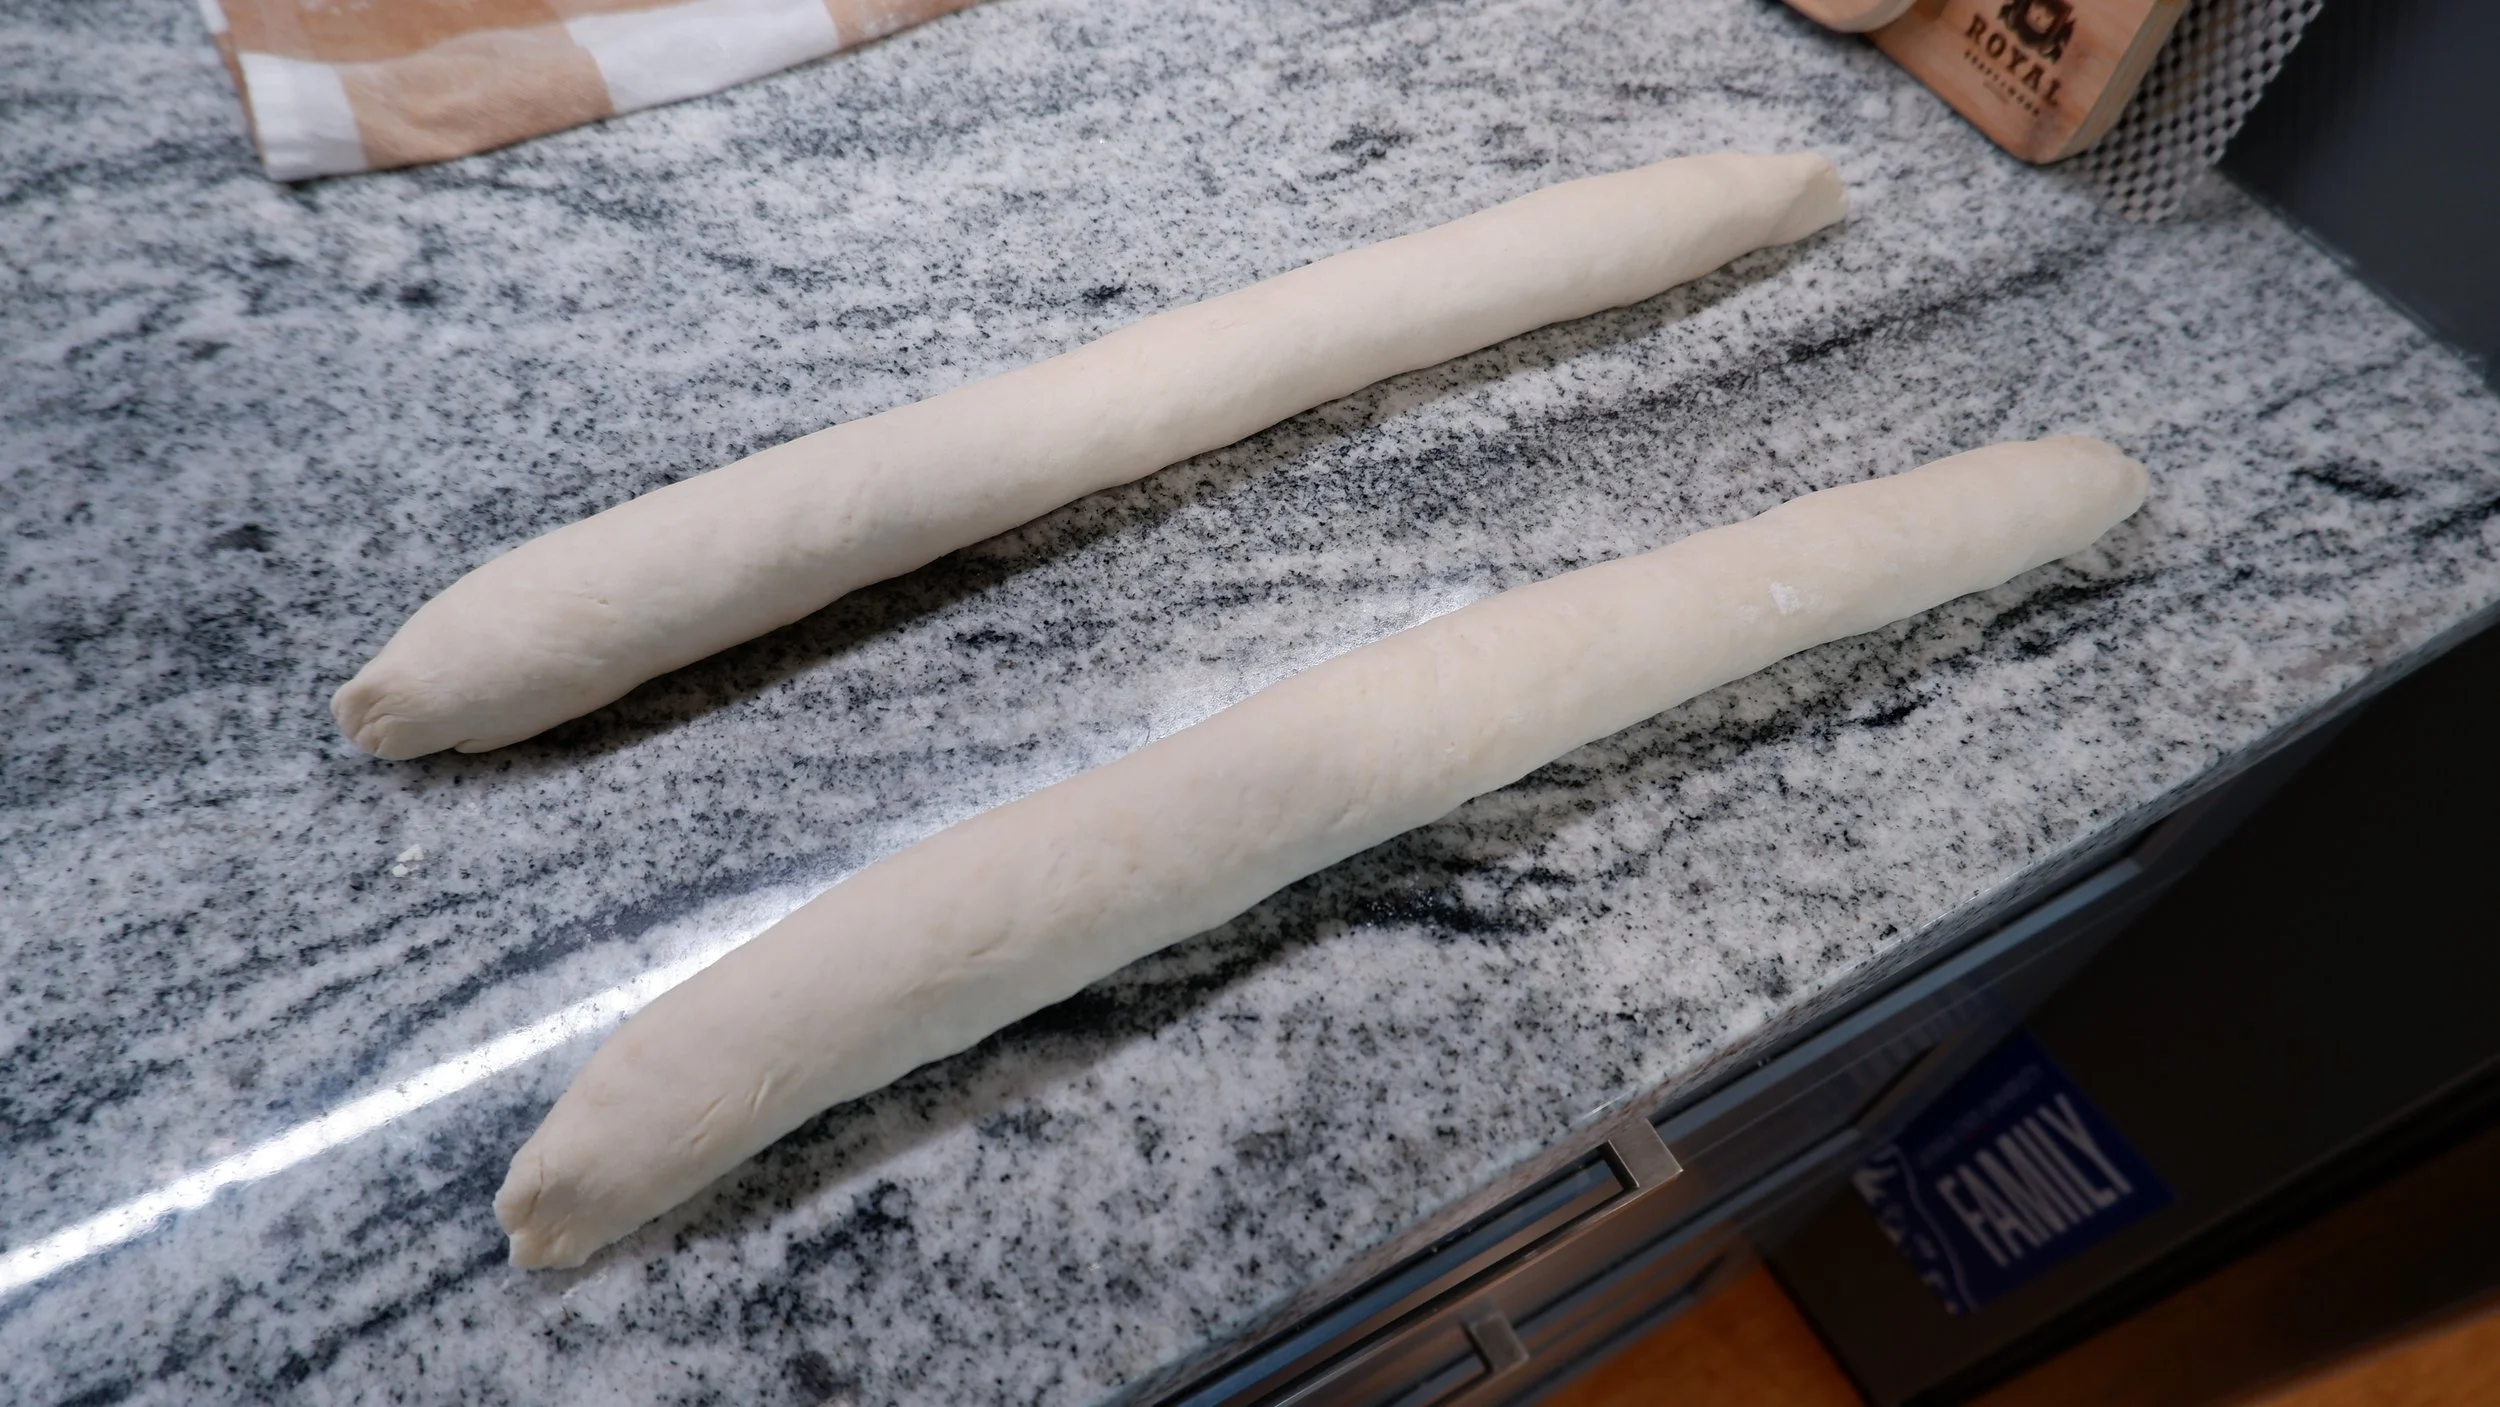
Forming loaves: 6 minutes
Each piece of dough was pressed out into a rectangle then rolled lengthwise. Be sure to close the seams well and tightly so they don’t come undone when baking. Next, I rolled each loaf to lengthen and taper the ends.


Proofing: 32 minutes
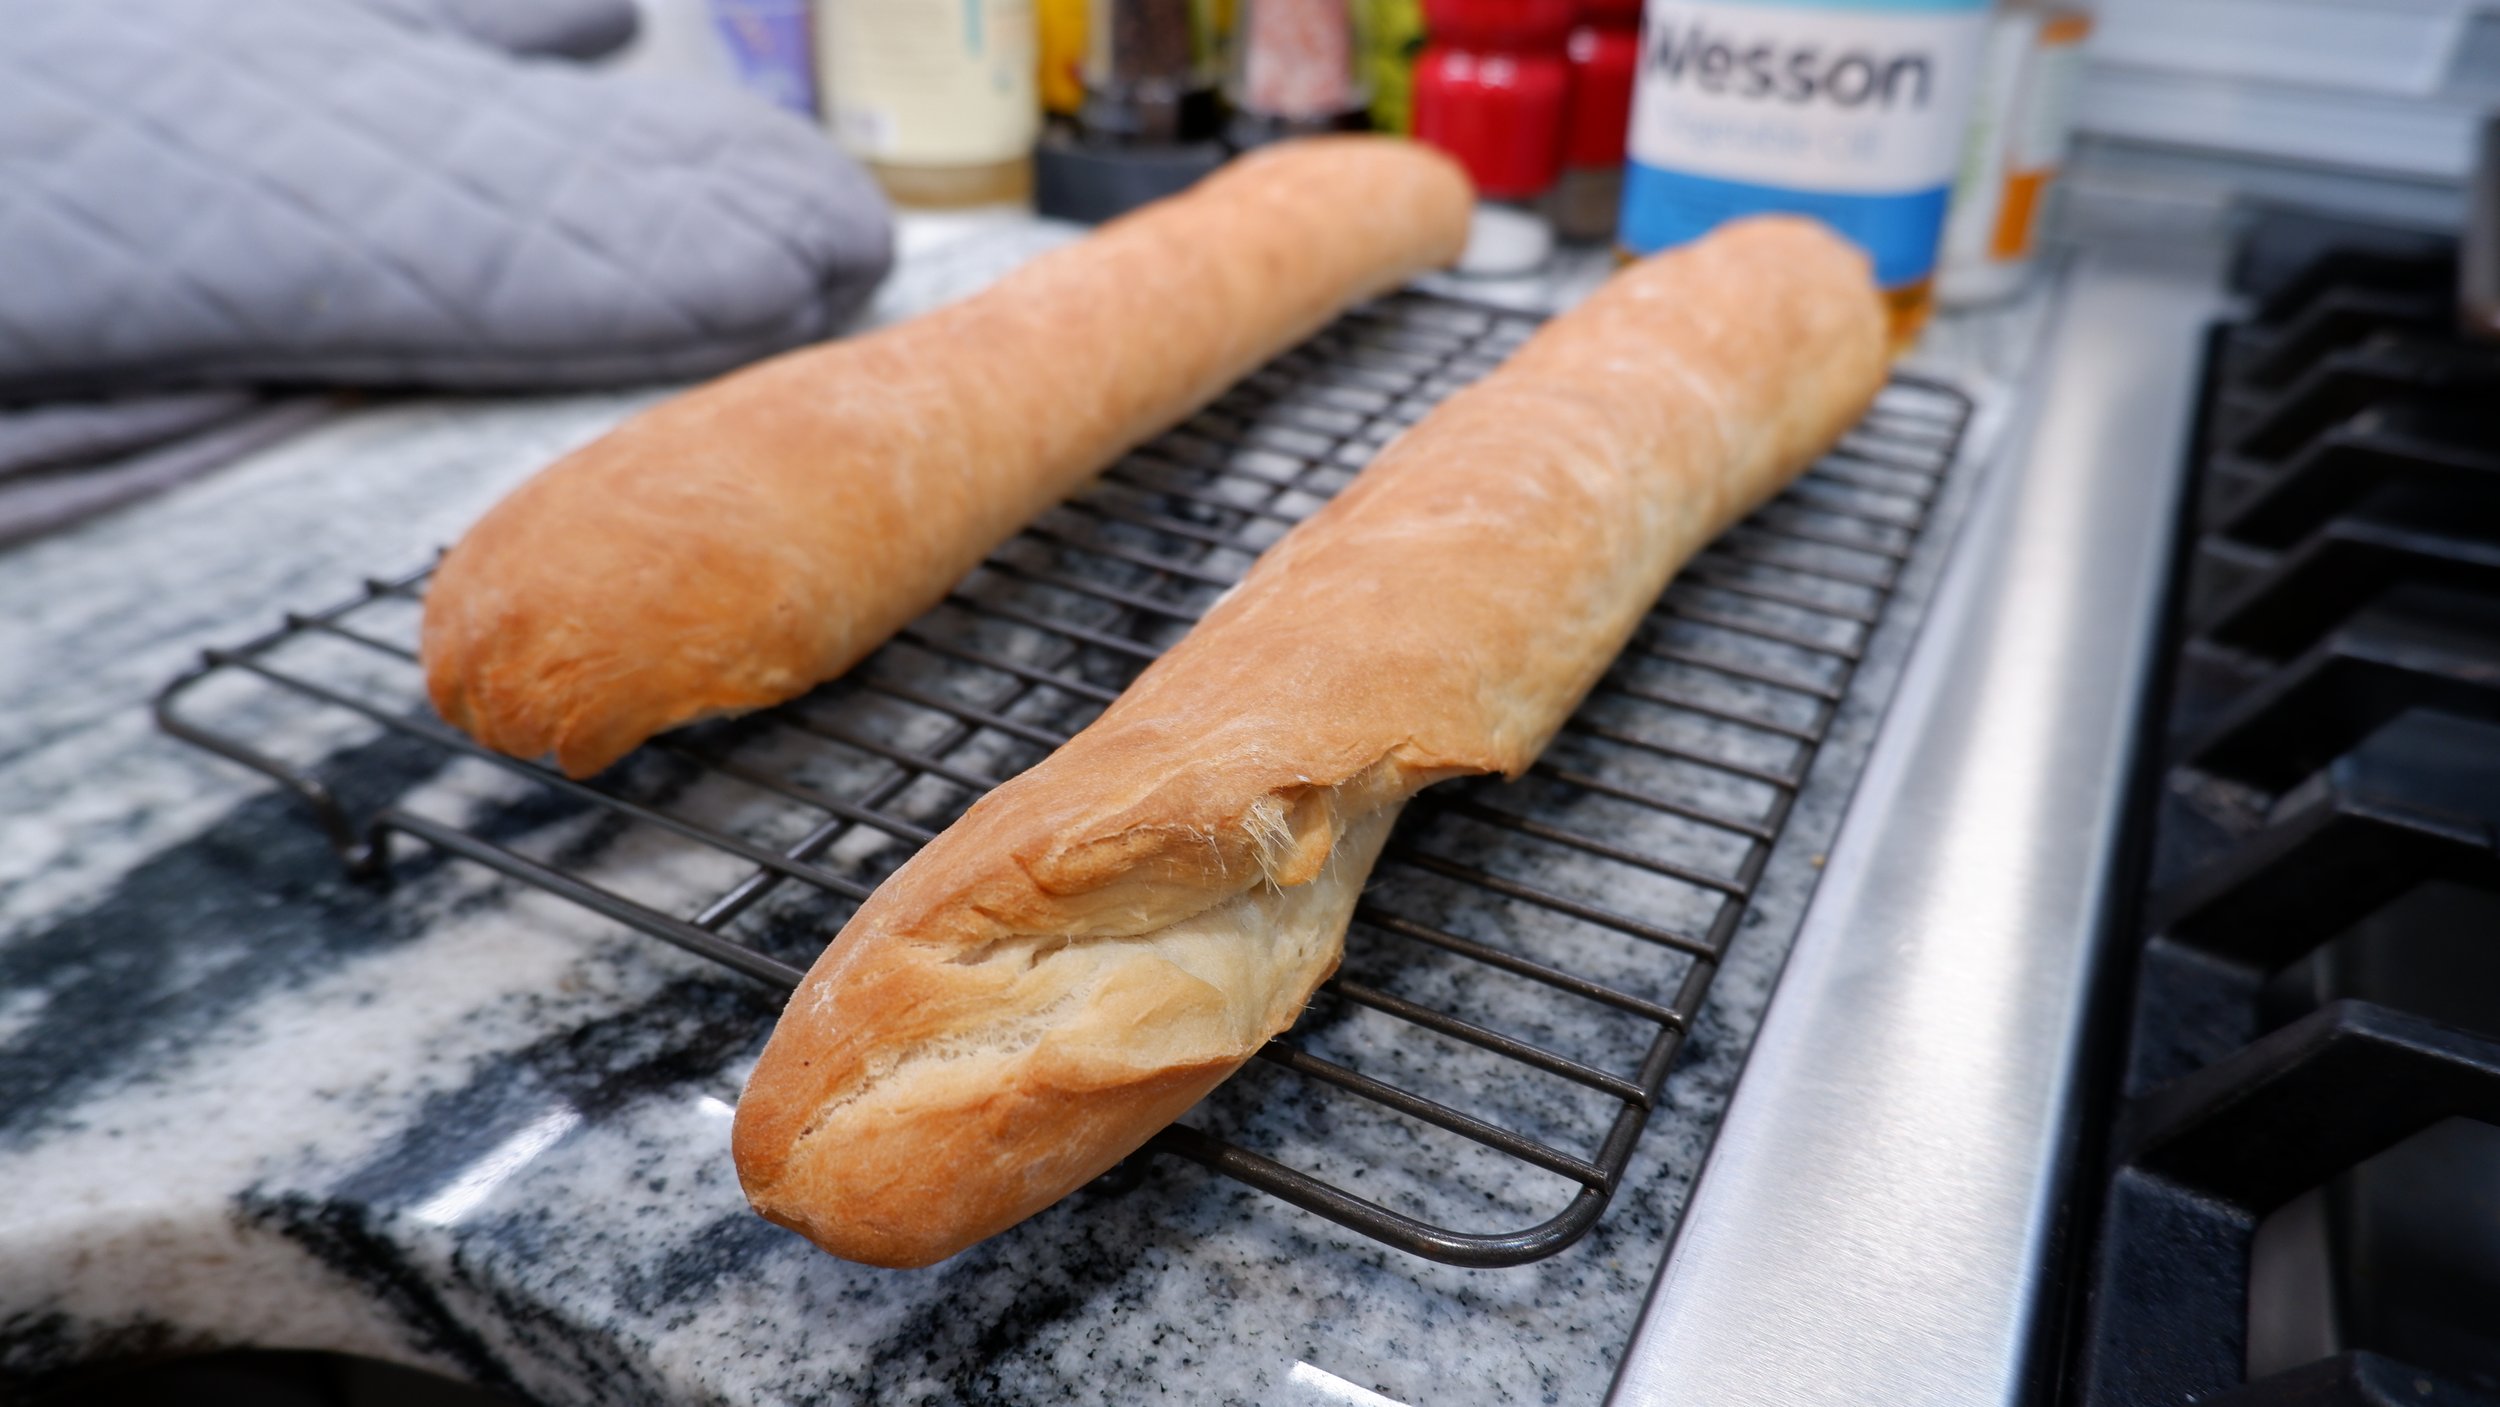
The loaves were transferred to a parchment lined baking sheet and covered with an inverted pan. About 10 minutes before the loaf was done proofing, I put a pan of water on the stove to come to a boil. I also tried scoring the top of the dough, but as you can see, it didn’t really work out. I used a paring knife, which I suppose wasn’t sharp enough to really cut the dough.


Baking: 30 minutes
I transferred the pan of water to the oven on the bottom rack and put the pan with the loaves on a rack above it. I also sprayed the inside of the oven with water to start the steaming. I let the bread bake at 400 degrees Fahrenheit for 10 minutes before removing the pan of water and reducing the temperature to 375. The bread cook for 20 more minutes before I removed it from the oven. I let the bread cool on a cooling rack before tasting.


Analysis:
Unlike nearly all of the other bread that I’ve made in the past, I think that this bread is actually worth the time and effort. When fresh, the exterior is nice and crisp while the interior remains soft and chewy. The flavor is great as far as bread goes. It’s slightly sweet and salty and just tastes better than store bought bread. I think the lard must be responsible for the improved flavor. I don’t think it’s quite as good as focaccia, but it’s easier to make than focaccia. After a day, the bread is stale, but if it’s toasted, it goes right back to the quality of the fresh bread, if not better. With that being said, Im going to give this bread a 9/10. The only issue I had was that the seam, which I though I closed well after rolling the dough, opened up during baking, making the sandwiches a little awkward to assemble. If you give it a try, I don’t think you’ll mind the time you spend on it.