Claire Saffitz’s Brioche Dough Buns
Do they taste as good as they look?
Claire details a easy way to make great bread at home
Difficulty: 2/5 Ingredient Availability: 5/5 Time: 4 hours (plus overnight rise)
Yes, this is another recipe from Claire Saffitz’s Dessert Person, but it isn’t a dessert. While brioche can be used in many different ways, especially in desserts, this time I’ll be using them as buns for another recipe I reviewed. I thought that the chicken sandwich recipe, which calls for brioche buns would be a great opportunity to make this dough because it could only elevate whatever the base recipe had to offer. On top of that, I could review two recipes at once. Brioche is a very rich bread, with lots of eggs and butter giving it its signature yellow color. It is also a very soft dough that pairs very well with nearly any sandwich ingredients. Instead of making the entire recipe, I halved all of the ingredients. I didn’t need the two loaves that the recipe makes fully, but if you’re making it for the first time, maybe go ahead and make the whole amount and experiment with some of the many things you can make with brioche (French toast, pigs in a blanket, cinnamon rolls, etc).
Key Ingredients and Omissions:
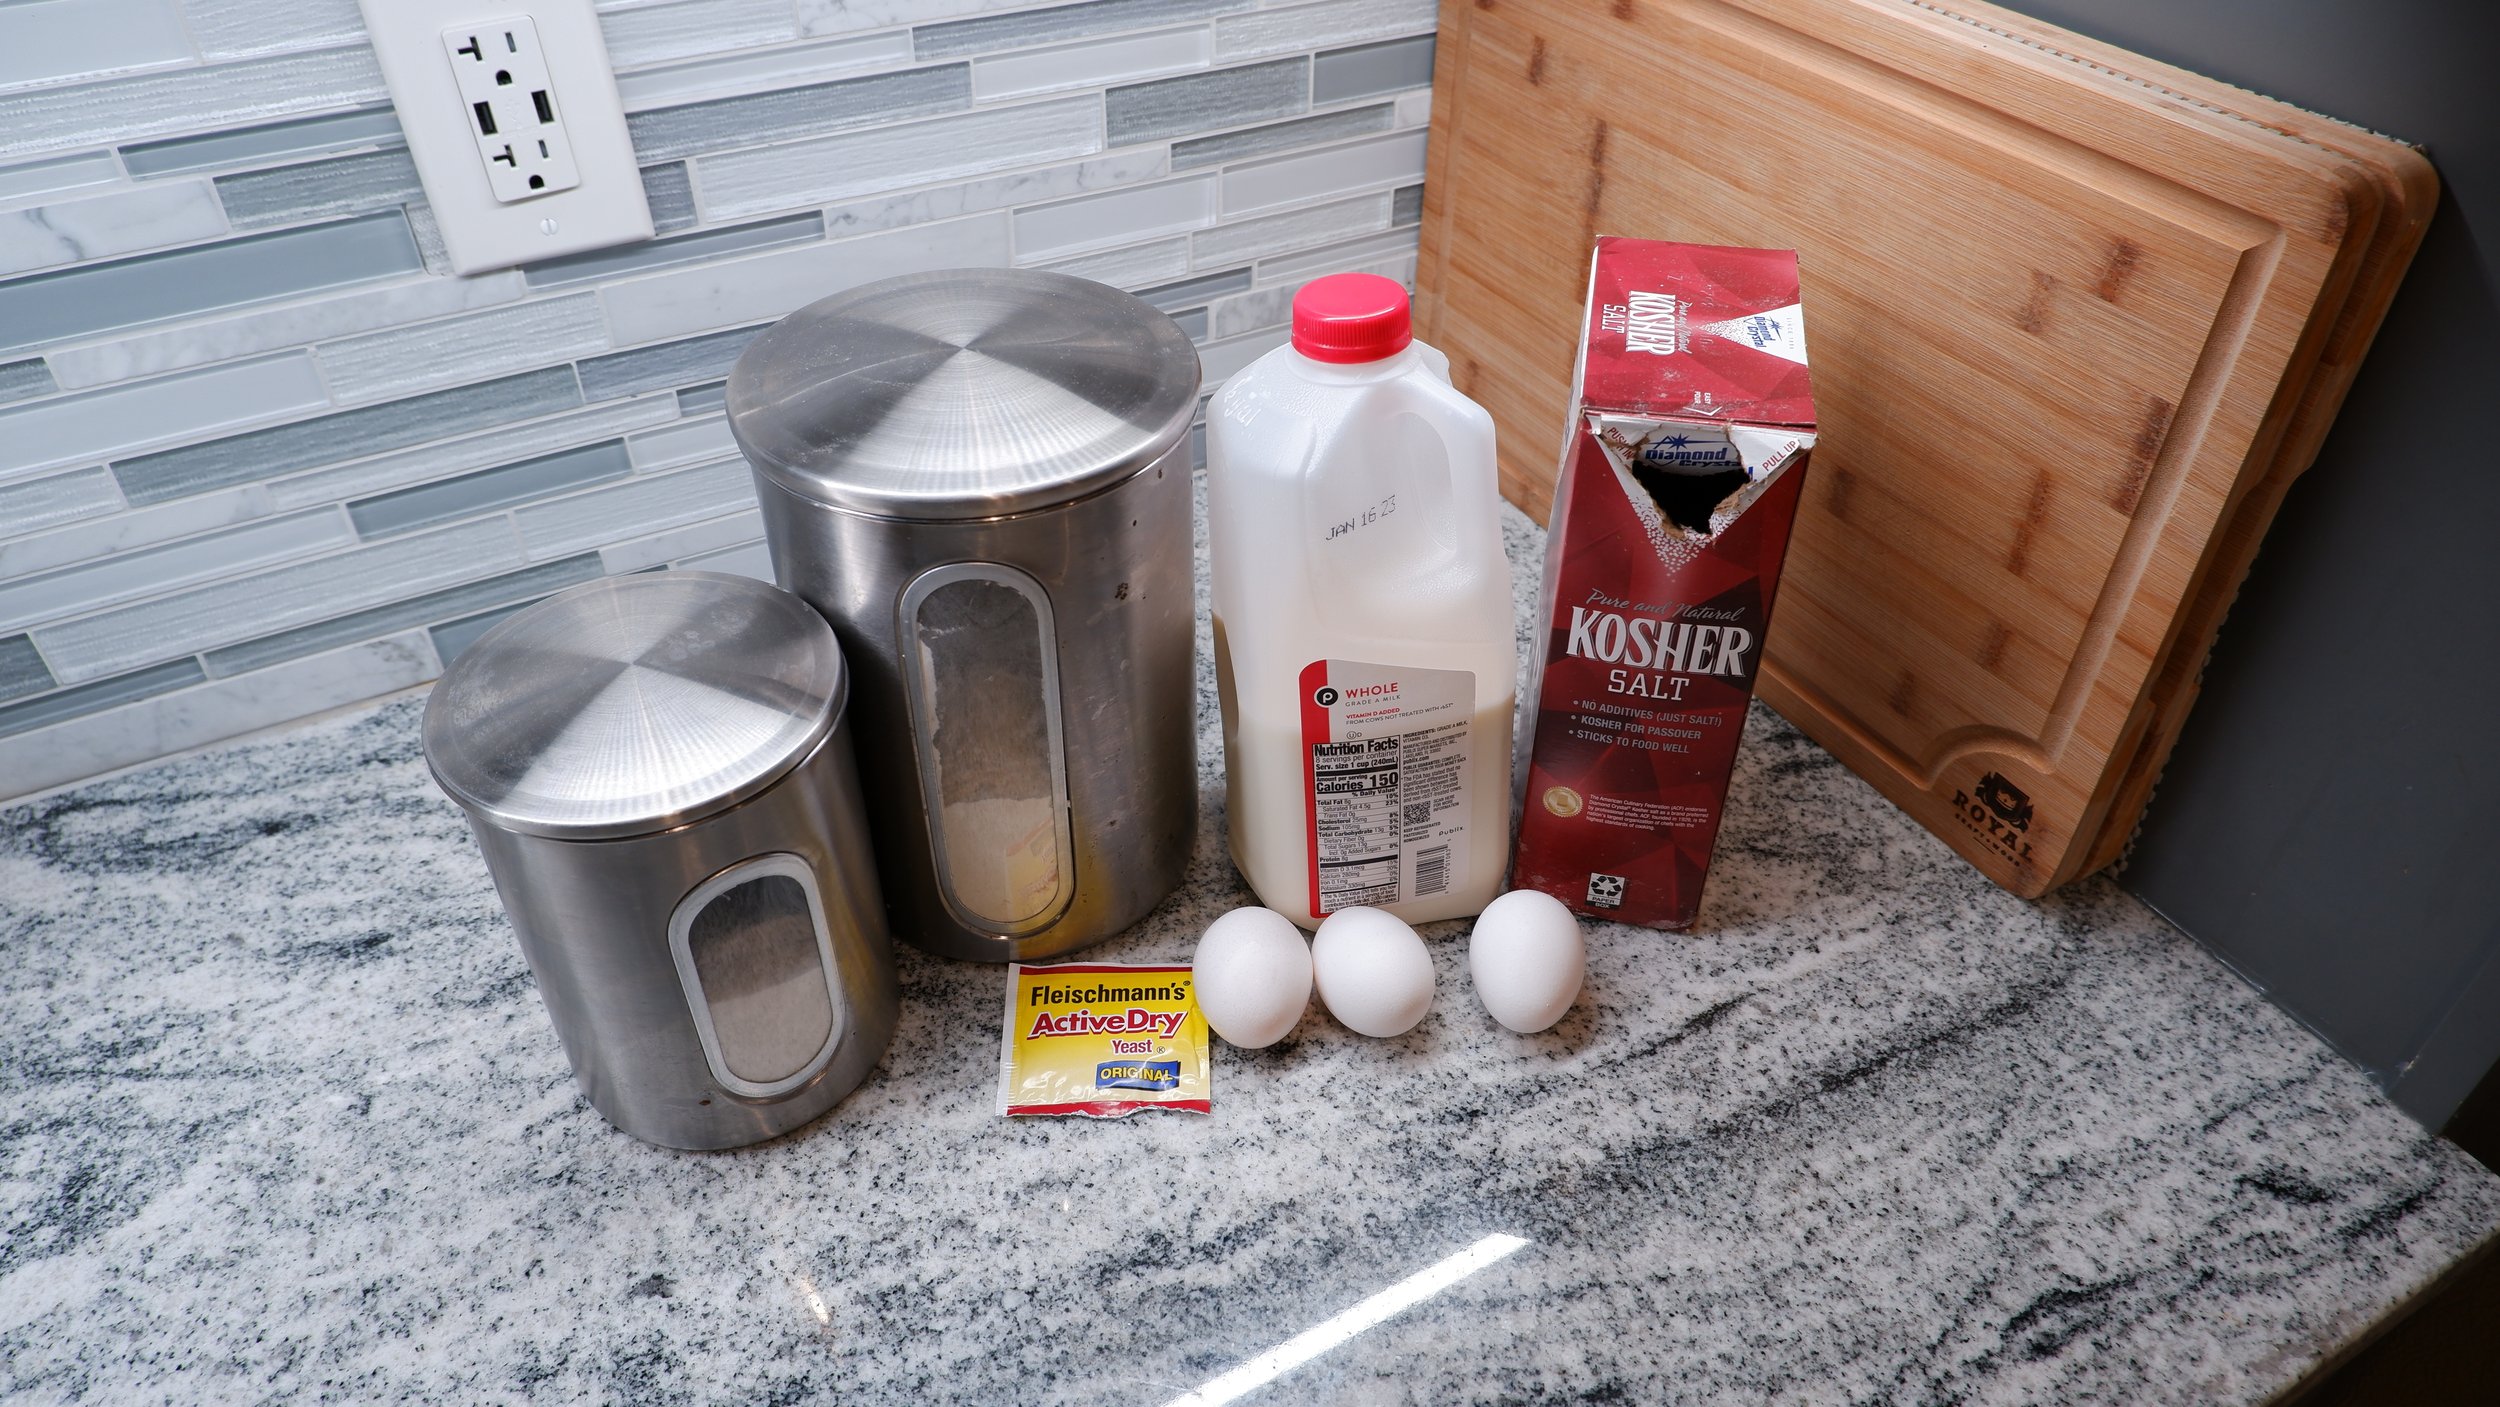
As usual, I forgot something in this picture, the butter.
You kinda have to use all the ingredients when you make bread.
No ingredients from this recipe were left out. It’s bread so if you leave anything out, there’s a pretty good chance that you’ll ruin the final product, if you even get one.
I had active dry yeast on hand, but this recipe will work just fine with instant yeast. The rising times may be slightly different, but given that you should let this dough rise overnight anyway, I wouldn’t say that it too crucial.
Given how much butter is used in this recipe, I would recommend you go with a nice unsalted butter. In any application where butter is near the forefront, I would definitely upgrade the butter used. This would also apply to biscuits and croissants. Also, I like to only buy unsalted butter, as most recipes call for this type and it allows you to add the perfect amount of salt without worrying about how salty the butter may be. Also, you really want to make sure your butter is room temperature before starting this recipe.
Tools:
Stand Mixer (you probably don’t want to try this one by hand, but if you like a challenge, Claire gives some hand mixing directions)
Cooking Review:
Proofing yeast and mixing dough: (50 minutes)
This recipe starts by warming some milk to proof your yeast in. If you’re using active dry yeast, you definitely don’t want to skip this step, as it requires rehydration before use. Otherwise, you might be able to get away with skipping it. However, if you’re worried that your yeast might be dead, this is sometimes a good way to test if your yeast is alive or not. I say sometimes because many times when I do this step, mixing yeast with a warm liquid and waiting), I never see the foam that the recipe’s author says to wait for. In this recipe, Claire says it takes about 5 minutes to start seeing the yeast doing its magic, but I waited 17 minutes and never saw any foam. Maybe I just needed to wait longer, but at the end of the day, my dough still rose, so my yeast was alive. After that, I mixed everything in the stand mixer except for the butter. I let it run on setting 3 for 5 minutes to form a shaggy dough then for 9 minutes (with one scraping of the bowl) on speed 6 until it was as described in the book. Initially, there was no sticking at all, but as time went on, I noticed the dough starting to stick to the sides of the bowl. To remedy this, I added about 1 and a half tablespoons of flour to the dough about half way through the mixing. Finally, I added the pieces of butter one at a time until it was all incorporated, which took me 12 minutes. If your butter is still cold, this will either take forever or not work at all, so save yourself some stress and just take your butter out about an hour ahead. You should do the same with your eggs. I didn’t take my eggs out with my butter and I don’t know how big of an effect it makes, but try to give them some time to come up to temp. I brought mine out maybe 30 minutes before they were needed in the recipe. (below, see the yeast and milk mixture, the ingredients before mixing, the shaggy dough, the dough before butter, and the dough after butter)


First Rise: 1 hr 25min
After transferring my flour dusted dough to a bowl and covering, I let it rise at room temperature for an hour and 25 minutes. You can see the size difference below. If you get to this point and see no difference, then your yeast was likely dead. While it would’ve been nice to know before you used all of the other ingredients, it’s still better than waiting overnight and attempting to bake and ending up with something inedible. It’s also a good idea to take a picture to compare the start and end. Most times I make bread and let it rise, I have a hard time telling if it really doubled without the picture.


Pan Prep and Second Rise: 1hr 15 min
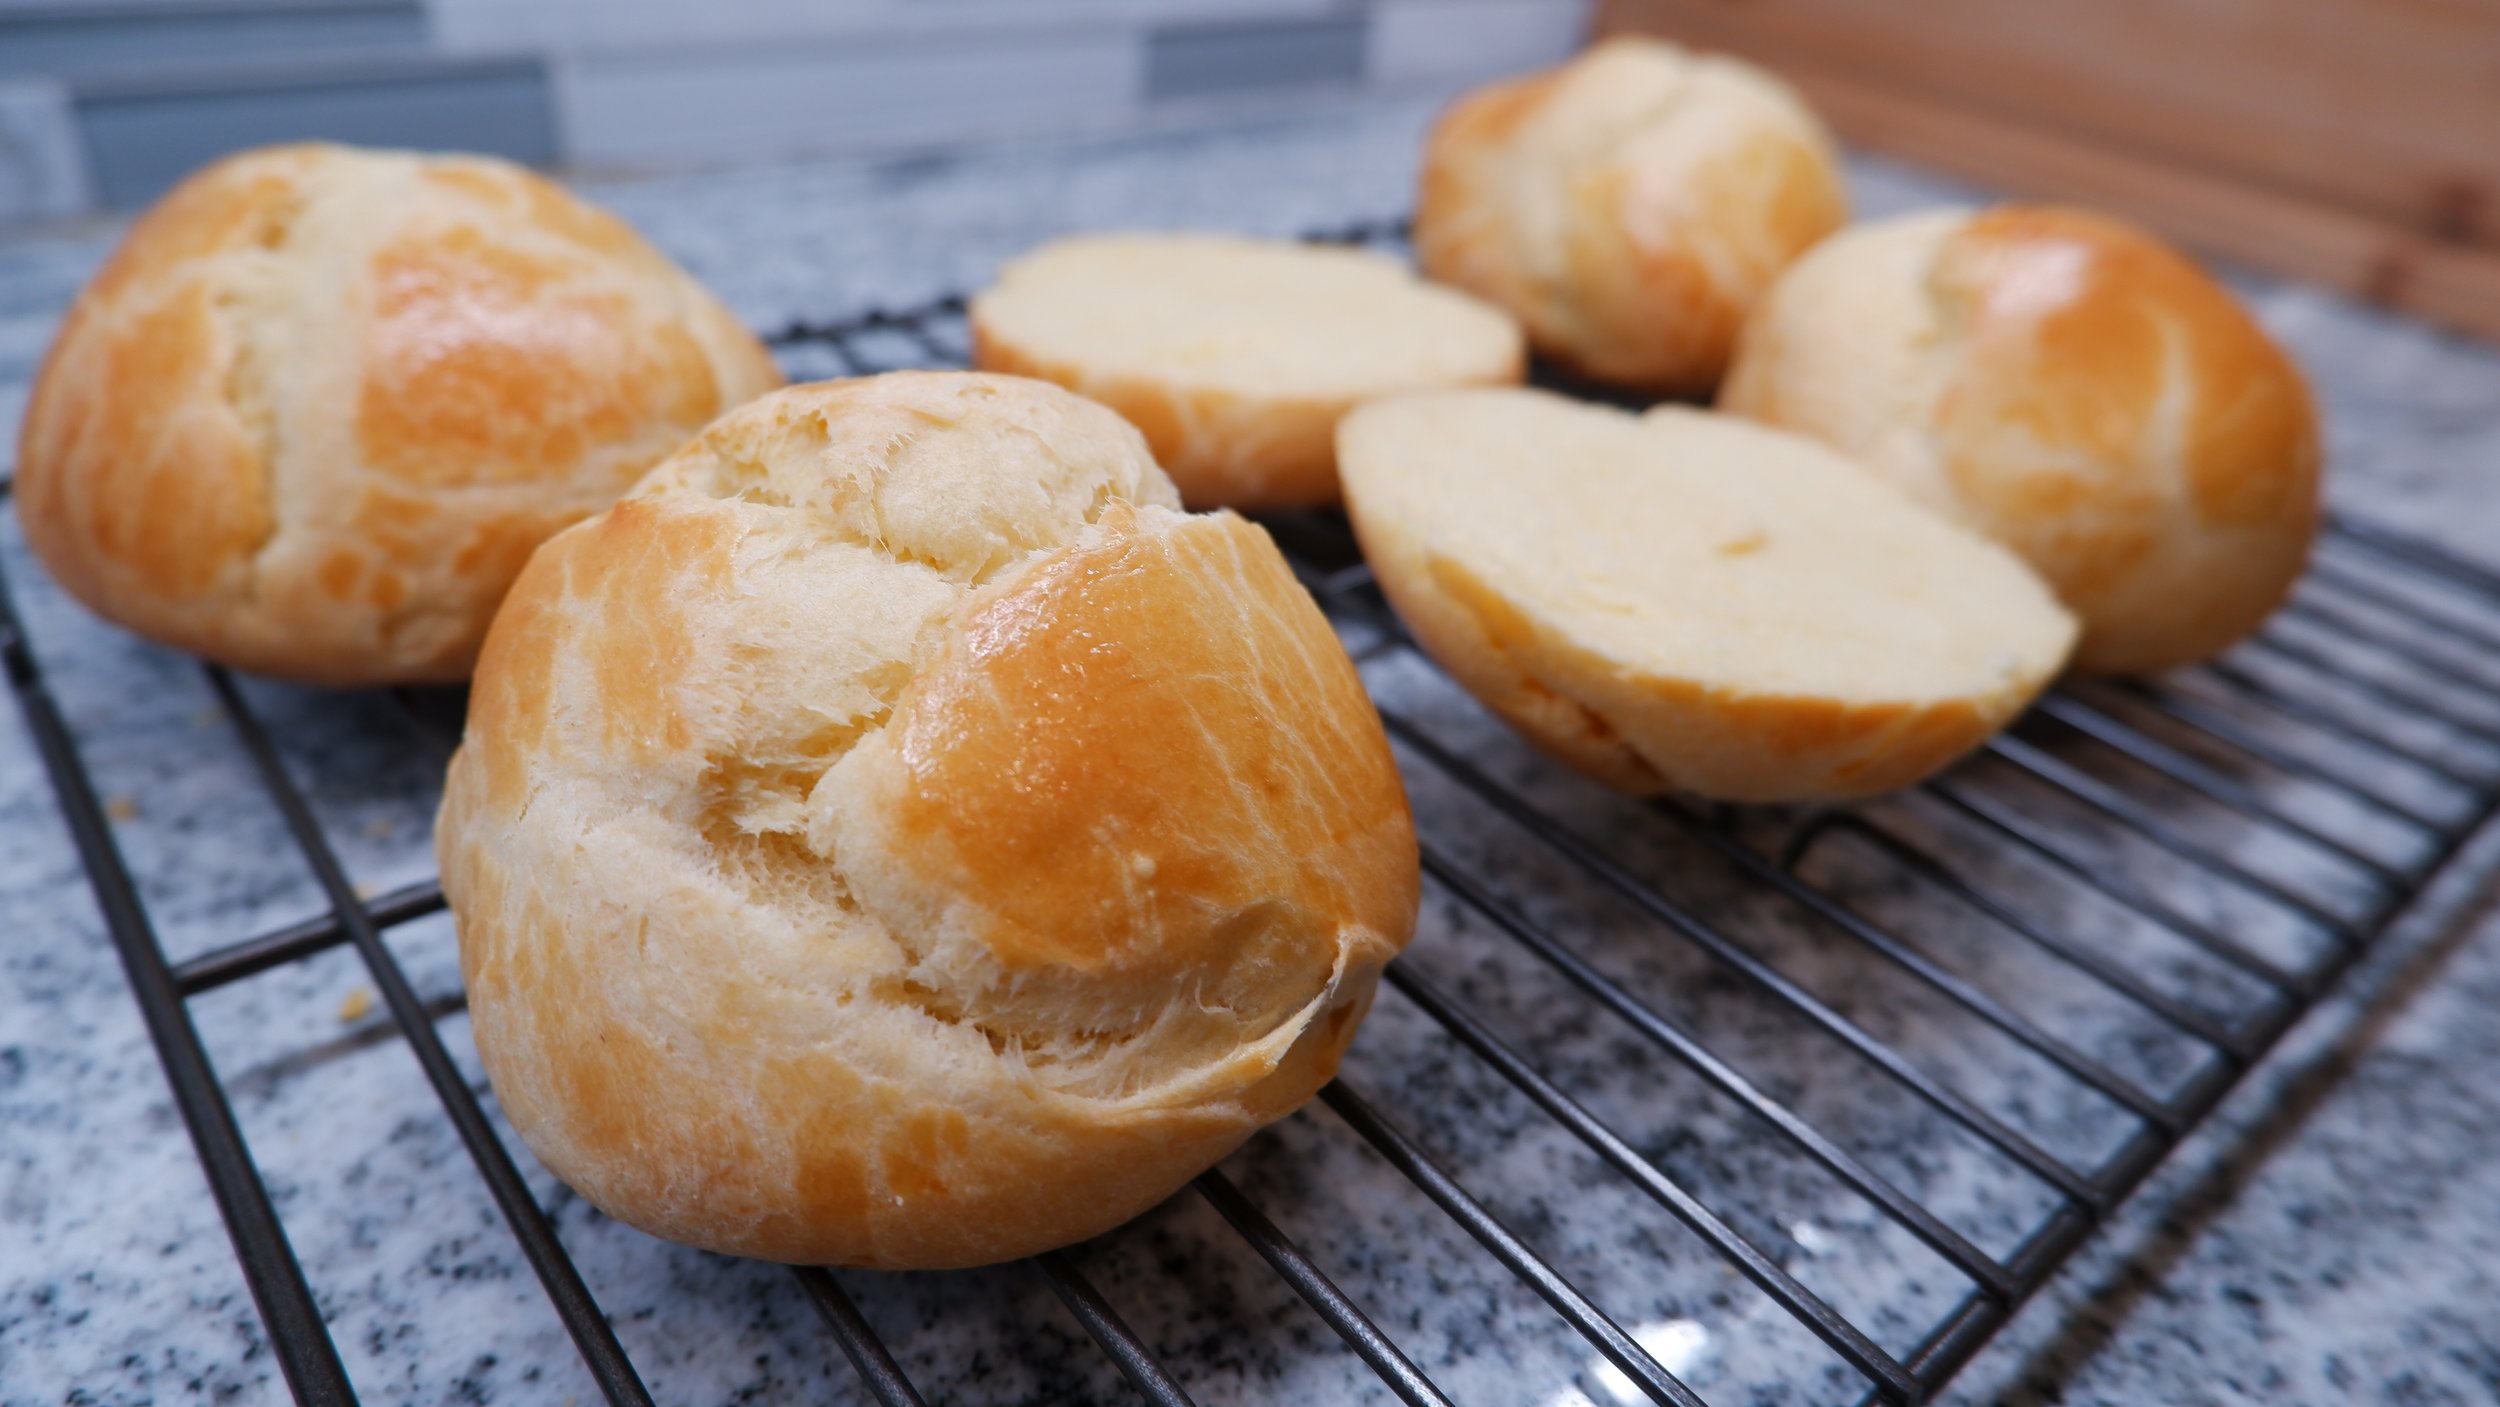
Instead of using loaf pans as the recipe guides, I used a sheet pan prepared in the same way to make my buns. It’s just butter and parchment paper, which takes no time at all. I took my dough out, punched it down and split it into 5 4oz pieces, and rolled it into balls before placing them on the prepared baking sheet to rise for another hour. Try to work the dough quickly, as it is much easier to work with when it’s cold. After the second rise, I brushed on some egg-wash to each risen ball.


Baking: 29 minutes
I wasn’t sure if the form factor of the bread would change the bake time, but the 30 minutes that the recipe suggests for the loaves is a amount of good time for the buns as well. I checked it a few times throughout just to make sure I wasn’t over cooking them, but I’d say if you’re making buns from this dough it should be fine without checking for at least the first 25 minutes. I knew they were done when they began browning on the top. After sitting for about 3 minutes on the baking tray, I let them cool completely on a cooling rack.
Analysis:
I’ve never had a truly bad home baked bread. This bread continues that streak. It filled my house with a very pleasant aroma, more than most other breads have, and delivered a rich and slightly sweet flavor. The butter flavors really come through, so if you have a favorite use it here. It’s not overpowering by any means, but it is noticeable. The brioche was arguably the best part of the sandwich I used it for. The buns were soft, but had no problem maintaining it’s structure under the load of a chicken sandwich with pickles, mayo, mustard, and honey. If you have a stand mixer, I highly recommend giving this recipe a try. It will definitely be better than most, if not all, brioche you can get from your local grocer. It just has more flavor than store bought breads do. The sweetness is a very nice touch, but doesn’t make it taste like more of a dessert than a vessel for more savory flavors. It really can do both. Given all this, I’m giving this recipe a 9/10. Because it almost requires a stand mixer to be worth making, I had to deduct a point. Although it’s very good, I wouldn’t say that this bread would be worth potential next say soreness from 10 minutes straight of slapping and folding. Next time, I’ll apply this recipe to a sweeter application for sure.

Toast them up with and make a sandwich, or spread favorite jelly or jam. Either way, you’ll be happy you made these.
P.S.
I run a leather working business and I’m proud to show off some of my new products! If you like want to pick anything up, you can use code THEANALYST for 10% off any order at MPW Werks. Thanks for reading!